No edit summary |
Tom Sponheim (talk | contribs) mNo edit summary |
||
| (5 intermediate revisions by 2 users not shown) | |||
| Line 1: | Line 1: | ||
| + | {{GoogleTranslateLinks}} |
||
| ⚫ | I ([[Brian White]]) made a "compound parabolic" solar cooker on a dome mold a few years ago. It was for unattended use. (The idea is to make something with characteristics intermediate between those of box cookers and parabolic cookers). I think it was successful and I was able to bring 7 liter pots of water to the boil. It was also possible to bake potatoes in the empty pot. (I did not have a thermometer that reads more than 100 |
||
| + | |||
| + | {{Updated|3|1|10}} |
||
| ⚫ | I ([[Brian White]]) made a "compound parabolic" solar cooker on a dome mold a few years ago. It was for unattended use. (The idea is to make something with characteristics intermediate between those of box cookers and parabolic cookers). I think it was successful and I was able to bring 7 liter pots of water to the boil. It was also possible to bake potatoes in the empty pot. (I did not have a thermometer that reads more than 100°C (212°F) at the time so I have no idea how hot it got inside. |
||
Following tests in software and with small models, I concluded that it did NOT have as long of an unattended time as I had hoped for. When I looked down on the model, with a red ball to represent the cooking pot, I could see areas with no red reflection, left and right of my view point. So If my eye was replaced by the sun, it would mean that the sunlight hitting those areas MISSED the target. The obvious conclusion (and one that few people have made) is that simply spinning a curve and making a dish is incorrect if you want unattended cooking. I have shown myself the problem using laser pointers too. (It does not transmit well to pictures). |
Following tests in software and with small models, I concluded that it did NOT have as long of an unattended time as I had hoped for. When I looked down on the model, with a red ball to represent the cooking pot, I could see areas with no red reflection, left and right of my view point. So If my eye was replaced by the sun, it would mean that the sunlight hitting those areas MISSED the target. The obvious conclusion (and one that few people have made) is that simply spinning a curve and making a dish is incorrect if you want unattended cooking. I have shown myself the problem using laser pointers too. (It does not transmit well to pictures). |
||
| Line 24: | Line 27: | ||
I know there is lots of work to do and I have just made a small start. Please get involved and make this happen for real. |
I know there is lots of work to do and I have just made a small start. Please get involved and make this happen for real. |
||
| − | [[File: |
+ | [[File:Animination.gif|frame|This animated gif shows a procedure for laying out the mirrors to make the clam shape]] |
| + | |||
| + | I had some nice weather in february so I made a full size clam shaped reflector and tried it out. It did not have stifening ribs and I think they are definitely needed if you copy what I did. I am putting in a few scans and pictures so that people can make their own. If you can scale the scans up by 3.8 times (on length) you will get the same size as I used. I used 3.8 times because it had the width dimension exactly the same as the width of my free corrugated plastic. (4 ft). |
||
| + | T[[File:Clam_cuts_template.jpg|thumb|Plastic template with cuts removed]]here follows scans and pictures to explain them |
||
| + | In my case, the plastic was a little small so I added a little to both ends to get the full size. |
||
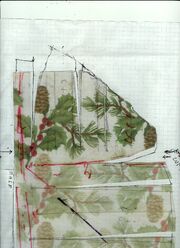
| + | [[File:Template_on_squared_paper_3.jpg|thumb|This shows how far I extended it at the top of photo]] |
||
| + | and this other file shows how much I extended it at the other end of the template. |
||
| + | Neither extension affects the cuts.[[File:Template_on_square_paper_2.jpg|thumb|Again, the extension is at the top of the photo]] |
||
| + | I multiplied the lengths by 3.8 and transfered them to a large piece of corrugated plastic sign that I used for the first working model. |
||
| + | If you follow my example, please use ribs underneath to keep the dish shape. I have not yet made the ribs but I have made rib templates. I include them here for your convenience. The real rib must go underneath the dish and have the curve that "fits" to the curve on my ribs but I am sure you can figure that out yourself. There follows scans of 3 ribs and pictures of how they fit together |
||
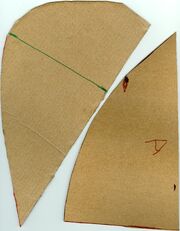
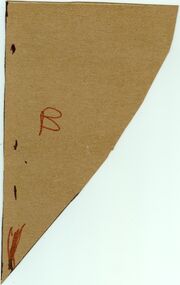
| + | [[File:Template_for_clamshell_2_ribs.jpg|thumb|here is the center rib and rib A]] |
||
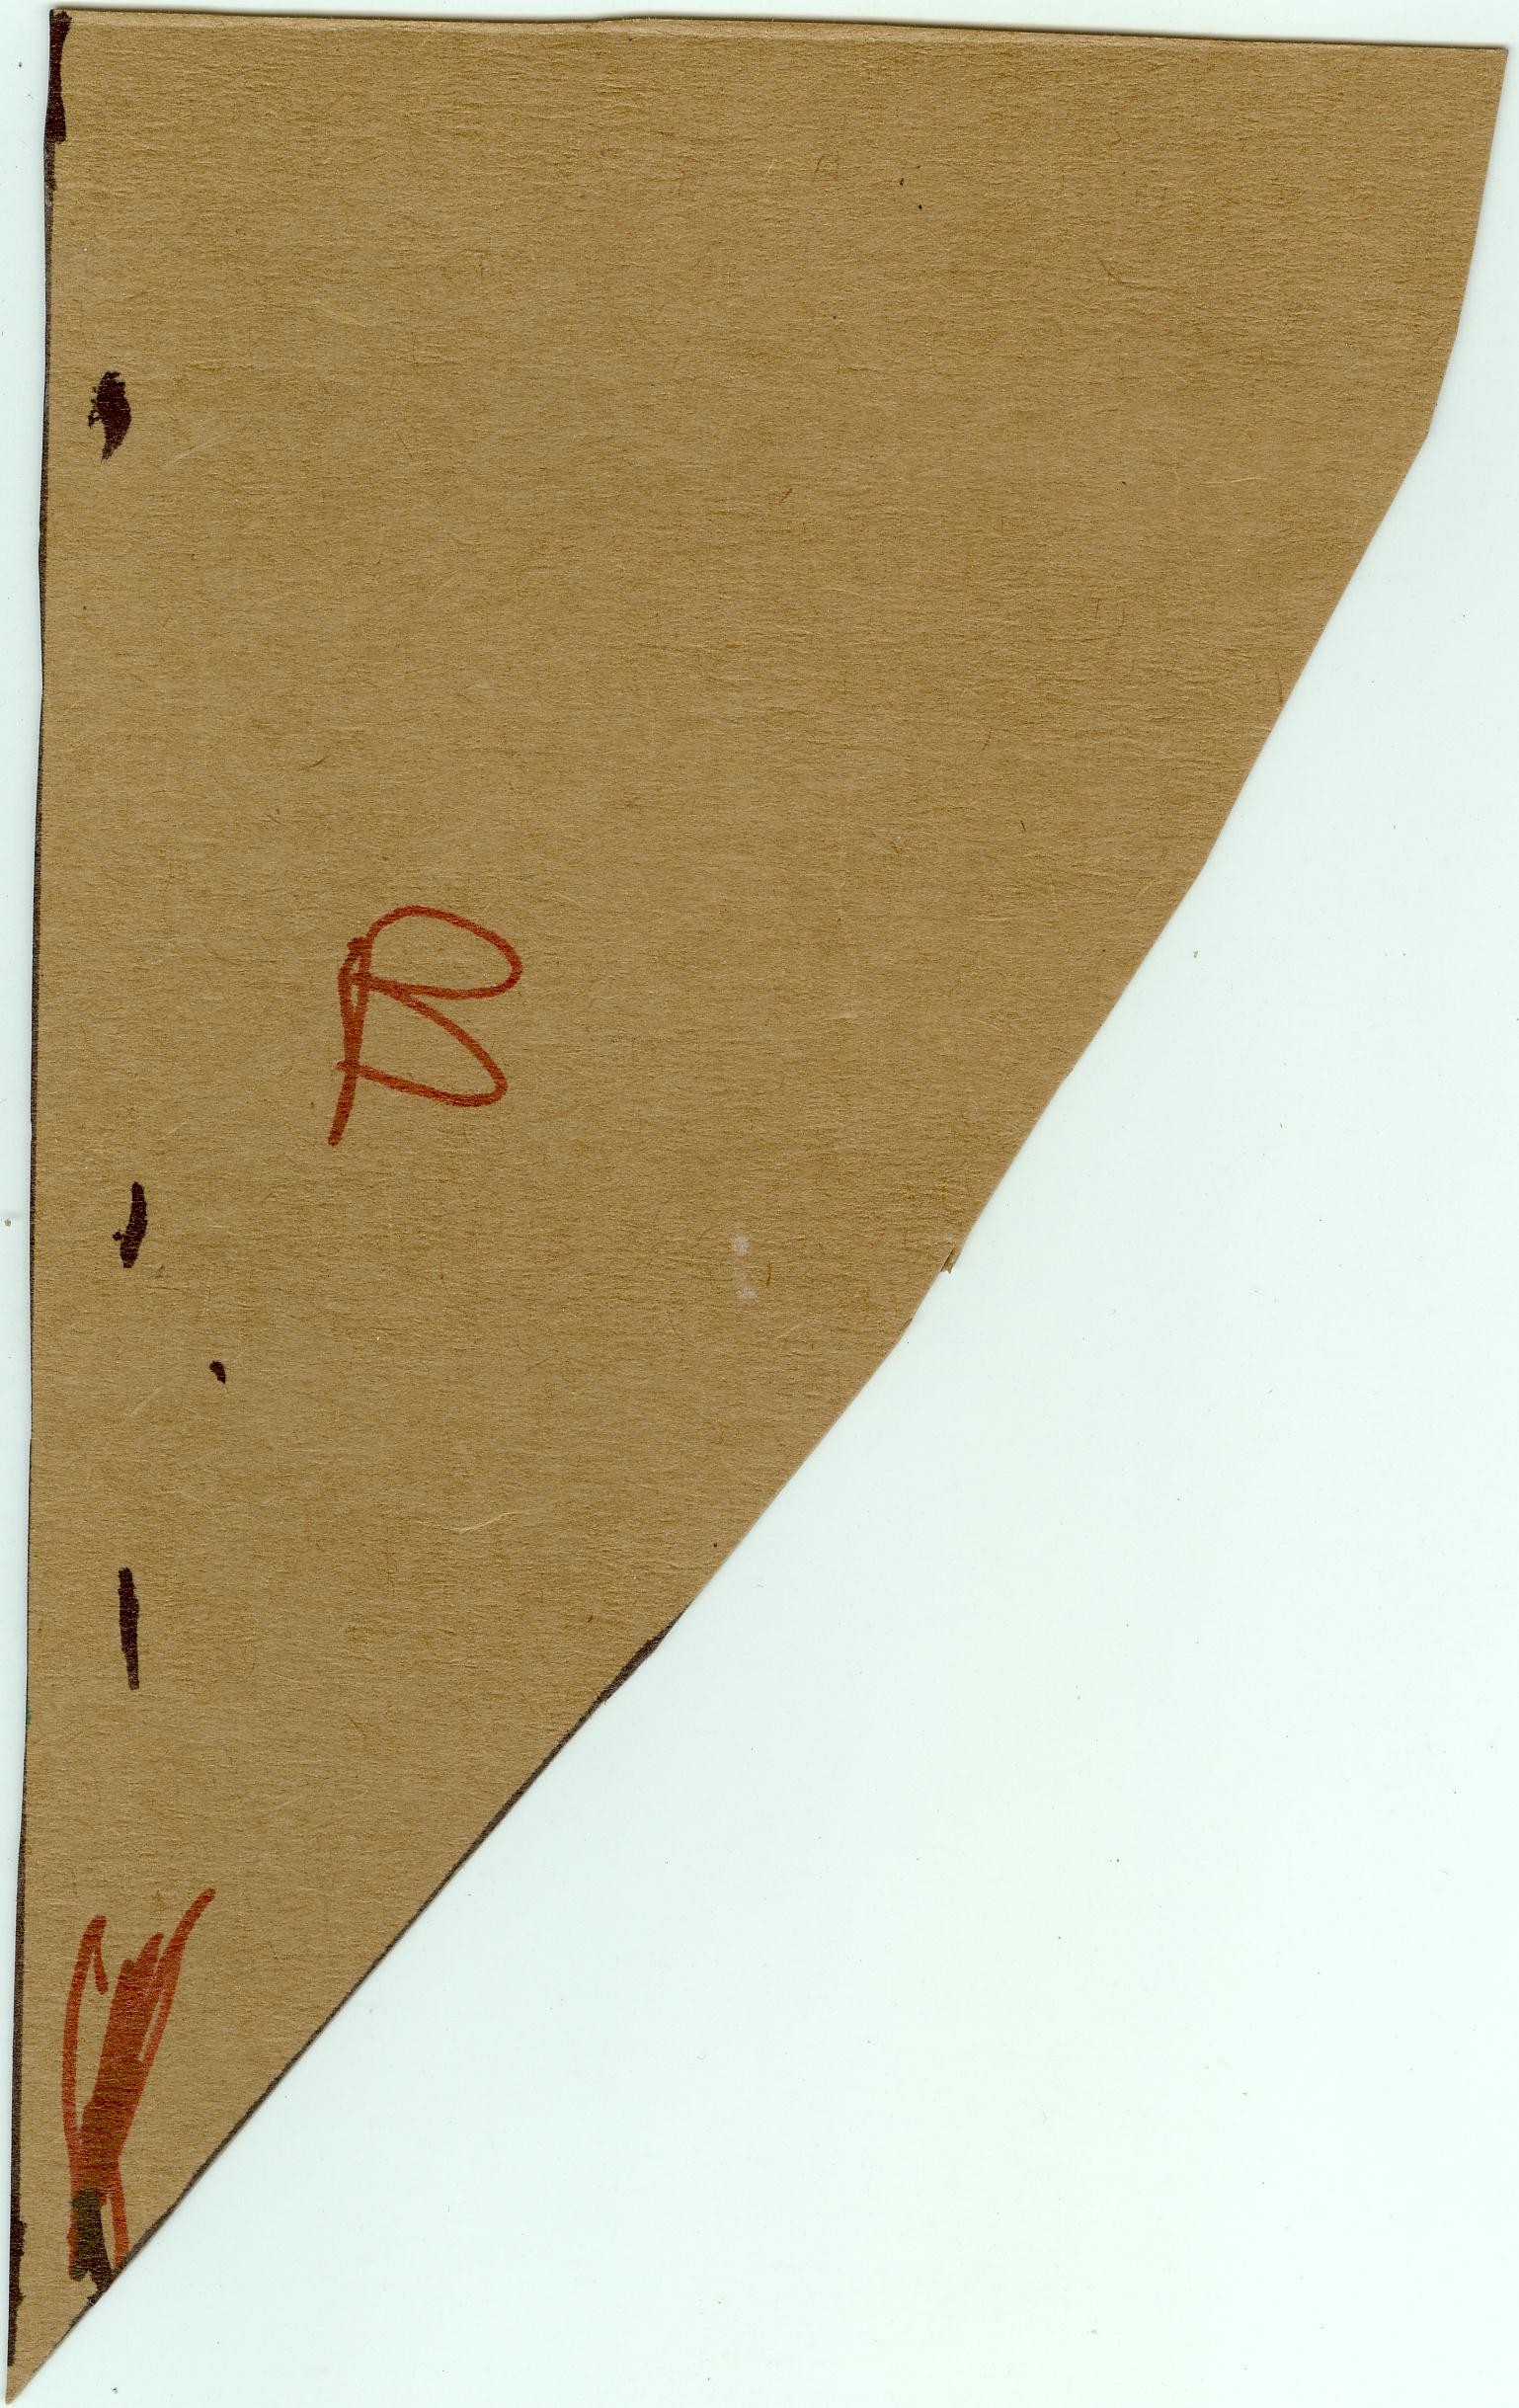
| + | [[File:Template_for_clamshell_1_rib.jpg|thumb|here is rib b]] |
||
| + | [[File:IMG_1007.jpg|thumb|Rib A is at 85 degrees, rib b is at 120 degrees and the other rib goes straight down the center]] |
||
| + | There is of course one center rib and there are 2 ribs a and 2 ribs b. My model was half a cooker and you have to copy everything to the other side of the center rib to make a mirror image on the other side. |
||
| + | Here is video of my first tests of the clam shaped dish. I did not have ribs behind it and if I had, I am sure it would have performed much better. |
||
| + | [[Video:I Cooked Potatoes in the clam shaped solar cooker|thumb|300px|right|This was the first cooking in the dish]] |
||
| + | I also have a video of making the full sized dish that might be helpful |
||
| + | it is at [[Video:Making the clam shaped reflector from a small template|thumb|300px|right|I scaled it up but no ribs yet to keep its shape]] |
||
| + | Anyway, that is it for now. Remember that the template is half of the dish. If you scale it up by 3.8 you will get half of the clam shape. Flip it over and lay it on the center line for the other half of the dish. The plastic template is exactly 279 mm long and all scans were taken at the same settings. |
||
| + | |||
| + | ==See also== |
||
| + | *[[Clam Shell Changes Draft]] |
||
| + | ==Contact== |
||
| − | Brian |
||
| + | {{See|Brian White}} |
||
[[Category:Research]] |
[[Category:Research]] |
||
[[Category:Solar cooker designs]] |
[[Category:Solar cooker designs]] |
||
Revision as of 01:57, 11 May 2014
|
|
|
Last edited: 1 March 2010
|
I (Brian White) made a "compound parabolic" solar cooker on a dome mold a few years ago. It was for unattended use. (The idea is to make something with characteristics intermediate between those of box cookers and parabolic cookers). I think it was successful and I was able to bring 7 liter pots of water to the boil. It was also possible to bake potatoes in the empty pot. (I did not have a thermometer that reads more than 100°C (212°F) at the time so I have no idea how hot it got inside.
Following tests in software and with small models, I concluded that it did NOT have as long of an unattended time as I had hoped for. When I looked down on the model, with a red ball to represent the cooking pot, I could see areas with no red reflection, left and right of my view point. So If my eye was replaced by the sun, it would mean that the sunlight hitting those areas MISSED the target. The obvious conclusion (and one that few people have made) is that simply spinning a curve and making a dish is incorrect if you want unattended cooking. I have shown myself the problem using laser pointers too. (It does not transmit well to pictures).
I wanted a solar cooker that concentrates ALL the light for 2 hours. Software was not helping and anyway there might be lots of variation in what people want from their solar cooker. Some will be happy with 1 hour unattended (and perhaps more powerful concentration). Others might want 2.5 hours. And some people will want to build their own.
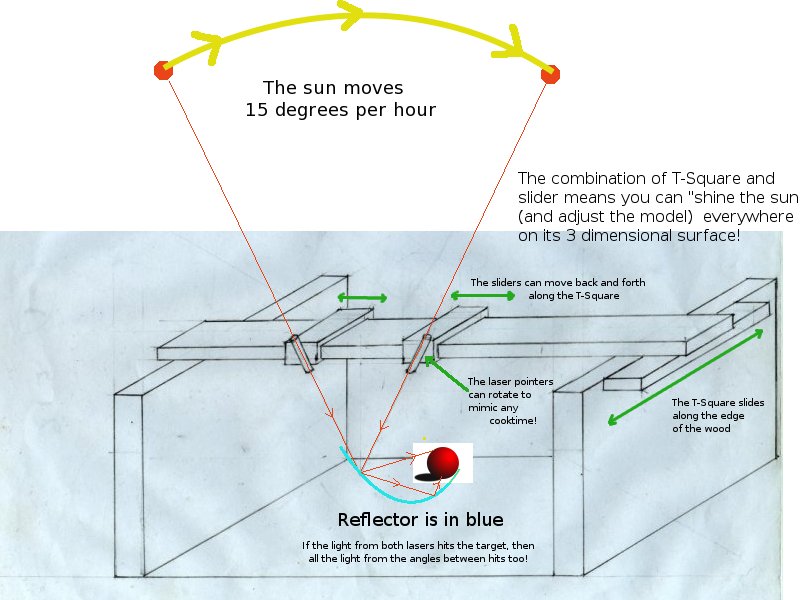
How the laser pointers "fill in" for the sun!
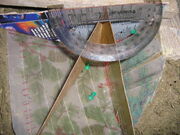
What shape will it be? I used 2 laser pointers to represent the sun shining directly onto a dish and bouncing to hit a target and to represent the light coming from 30 degrees different. (This represents a 2 hour difference). The sun is like a giant spotlight so I put the laser pointers on a slider on a tsquare above the target. This means that the lasers can be moved to be above any point on the model and still point in the same direction. I used small glass mirrors stuck into wet mud to make sure that at each point, the light from both lasers would bounce off the dish and hit the target. To get more reflector area, this meant that sometimes the light bounced more than once.
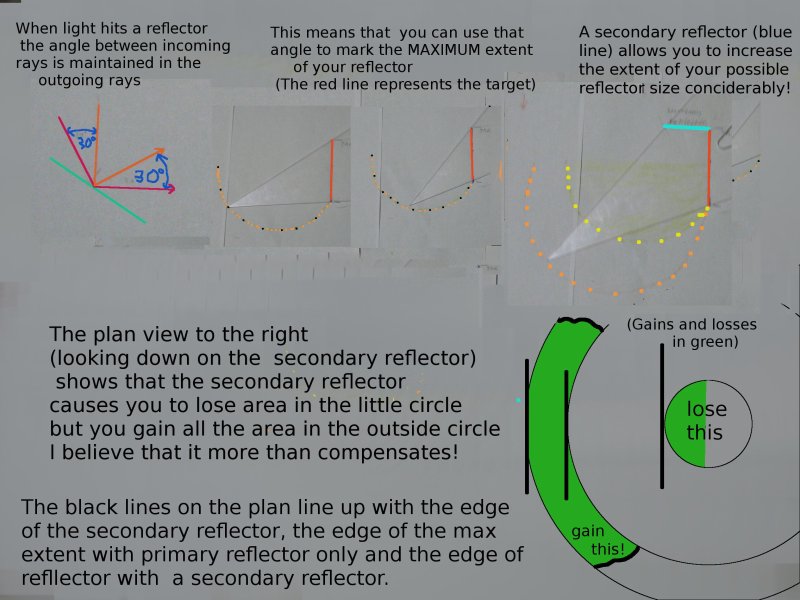
One bounce is an article of faith with some people. It is simply too limiting.
The green shows the lost productive area and the gained productive area with 2 bounces of light
Anyway, I used the lasers on the t-square until I ran out of mirrors. By then half of the shape was made and the other half would be a mirror image of the first side. The shape was roughly the same shape as a clam shell. The shell was in line with the path of the sun and the target would go where the shell of a clam would "hinge"
I measured the size of the ball that I used as target and the area of the reflector. When it is scaled up, for a 7 liter pot size the collector area is similar to that of the compound parabolic solar cooker from a few years ago. So we might conclude that results from a full sized cooker will be similar too. Check out the PDF file for that cooker to have a ball park idea of what the results might be like for a 0.9 sq meter collector. I would suggest that they will be better because in this case, you can insulate about 25% of the pot surface. (The part of the pot in the "ray shadow" at the top behind the mirrors, so you should get the same amount of heat in but less heat loss out through a smaller area).
This is a new class of solar cookers. It is a little more difficult initially than some other types because it HAS to line up with the path of the sun. So generally, they will have to be on equatorial mount or there will have to be an equatorial mount nearby for reference. However, once the mount is set up, you have certainty. You will know exactly how long your food will cook for, you will know exactly when to come back to eat it and you should have more concentration than a box cooker but much less danger than a parabolic.
Please note that the solar design t-square could also be applied to panel cooker design, or box cooker reflector design. Box cookers are reasonably good for up to 4 hours without moving them. I think you could use the t-square to design reflectors that give just 2 hours of collection but APPRECIABLY HIGHER concentration over that 2 hours.
And with a very long t-square, you could make the reflector directly.
I will be unable to make and test one until March due to the cloudy winter climate I have.
I know there is lots of work to do and I have just made a small start. Please get involved and make this happen for real.
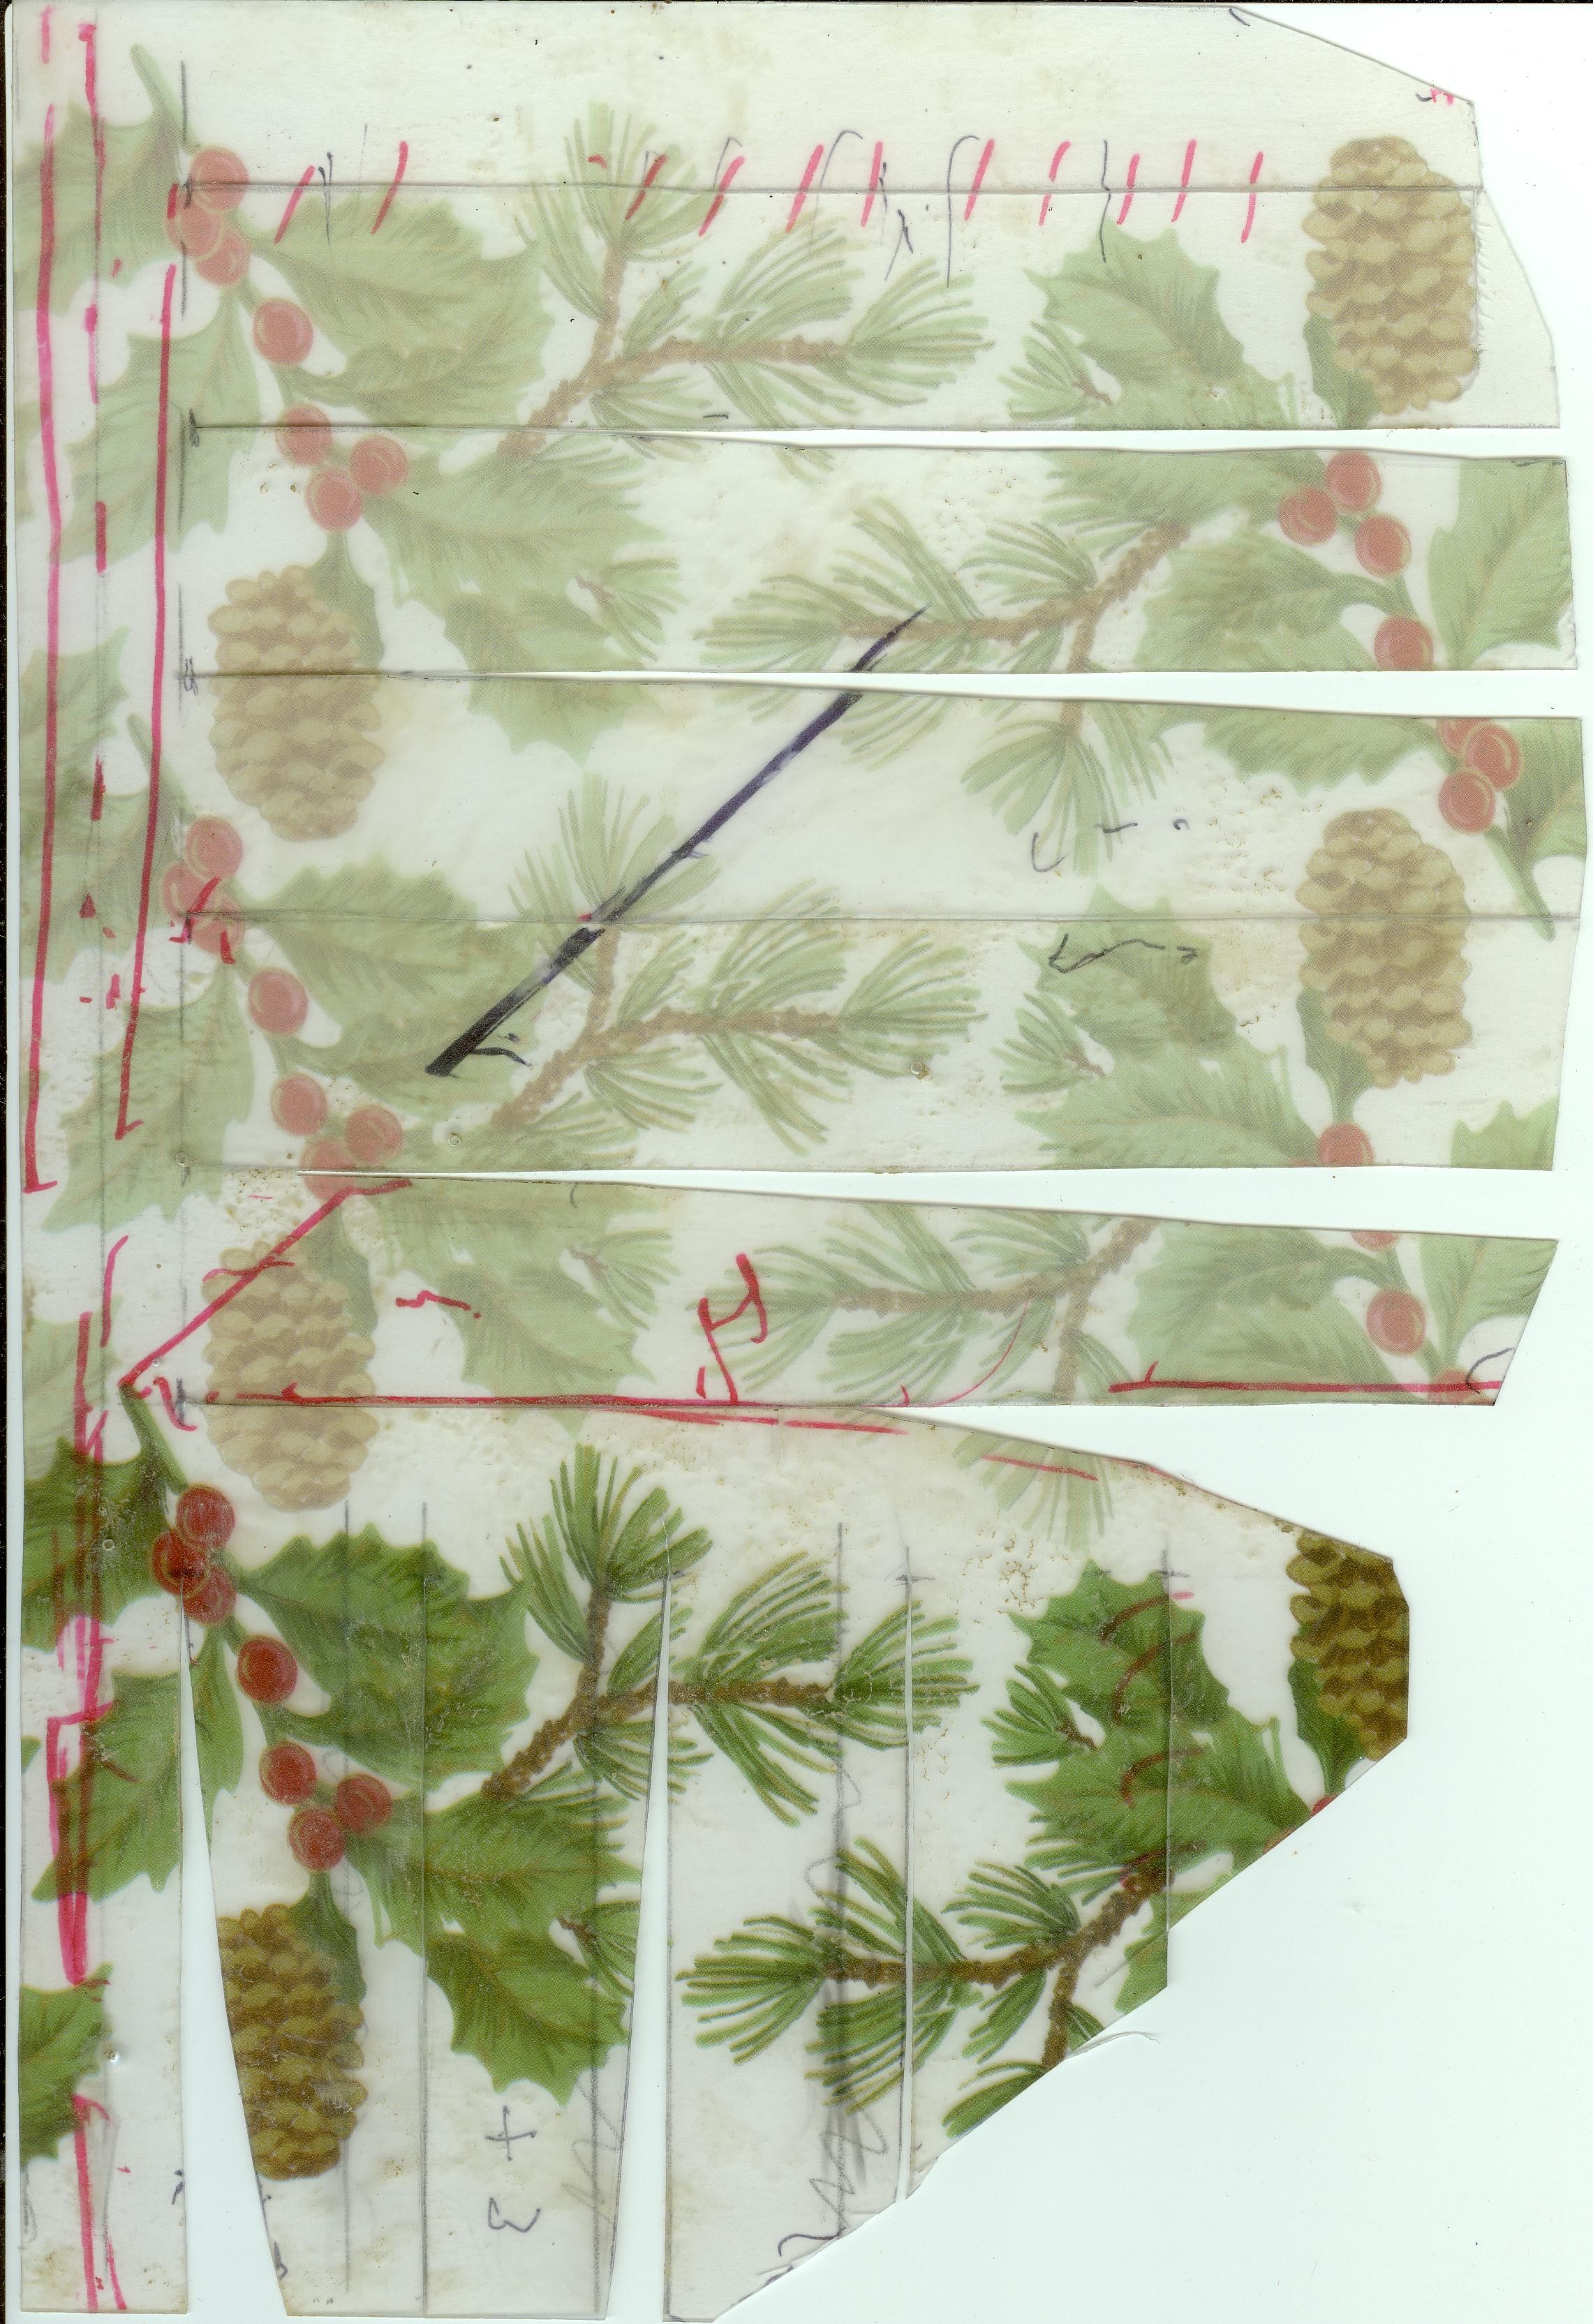
This animated gif shows a procedure for laying out the mirrors to make the clam shape
I had some nice weather in february so I made a full size clam shaped reflector and tried it out. It did not have stifening ribs and I think they are definitely needed if you copy what I did. I am putting in a few scans and pictures so that people can make their own. If you can scale the scans up by 3.8 times (on length) you will get the same size as I used. I used 3.8 times because it had the width dimension exactly the same as the width of my free corrugated plastic. (4 ft).
T

Plastic template with cuts removed
here follows scans and pictures to explain them
In my case, the plastic was a little small so I added a little to both ends to get the full size.

This shows how far I extended it at the top of photo
and this other file shows how much I extended it at the other end of the template.
Neither extension affects the cuts.


Again, the extension is at the top of the photo
I multiplied the lengths by 3.8 and transfered them to a large piece of corrugated plastic sign that I used for the first working model. If you follow my example, please use ribs underneath to keep the dish shape. I have not yet made the ribs but I have made rib templates. I include them here for your convenience. The real rib must go underneath the dish and have the curve that "fits" to the curve on my ribs but I am sure you can figure that out yourself. There follows scans of 3 ribs and pictures of how they fit together

here is the center rib and rib A
here is rib b

Rib A is at 85 degrees, rib b is at 120 degrees and the other rib goes straight down the center
There is of course one center rib and there are 2 ribs a and 2 ribs b. My model was half a cooker and you have to copy everything to the other side of the center rib to make a mirror image on the other side. Here is video of my first tests of the clam shaped dish. I did not have ribs behind it and if I had, I am sure it would have performed much better. thumb|300px|right|This was the first cooking in the dish I also have a video of making the full sized dish that might be helpful it is at thumb|300px|right|I scaled it up but no ribs yet to keep its shape Anyway, that is it for now. Remember that the template is half of the dish. If you scale it up by 3.8 you will get half of the clam shape. Flip it over and lay it on the center line for the other half of the dish. The plastic template is exactly 279 mm long and all scans were taken at the same settings.
See also
Contact
- See Brian White.Brian White